Mistakes Everyone Makes When Baking Bagels
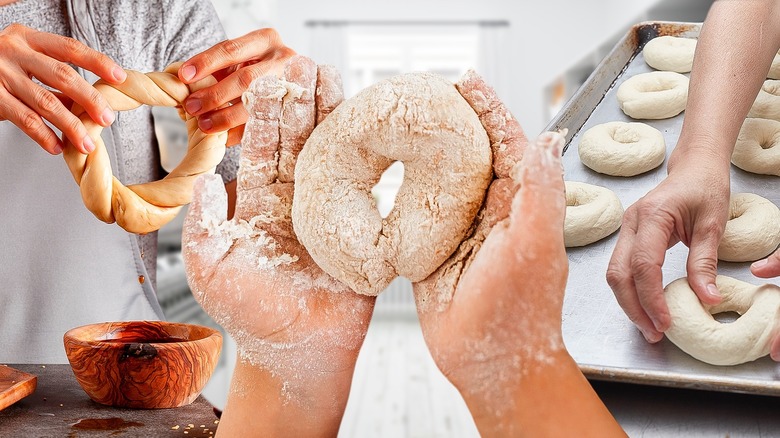
Nothing can quite match fresh bagels straight from the bakery, with their crusty, blistered exterior and chewy middle. But, perhaps when you have tried making them yourself at home, things have gone awry. People often make mistakes with bagels, probably because they aren't the simplest of baked goods to bake. Once you know what you're doing wrong, however, it starts to get easier.
Perhaps you've ended up with a bagel that's more like a bread roll, or you've had overly dense results. You might have been cursed with flat bagels or found yours way less flavorful than your favorite bakery versions. All these issues — and more — can be caused by some of the most common bagel-making errors.
We wanted to find out what often goes wrong and how to stop it from happening, so we talked to three bagel experts — a baker, a food blogger, and a recipe developer — to get the goods. Even if you're experienced at baking with yeast, making bagels can be a bit of a learning curve. The boiling step is unlike most baked goods, and the dough needs to ferment for longer than you'd think to make it flavorful. With the tips and advice you'll learn from our experts, you'll soon be making bagels that rival what New York has to offer.
Using the wrong flour
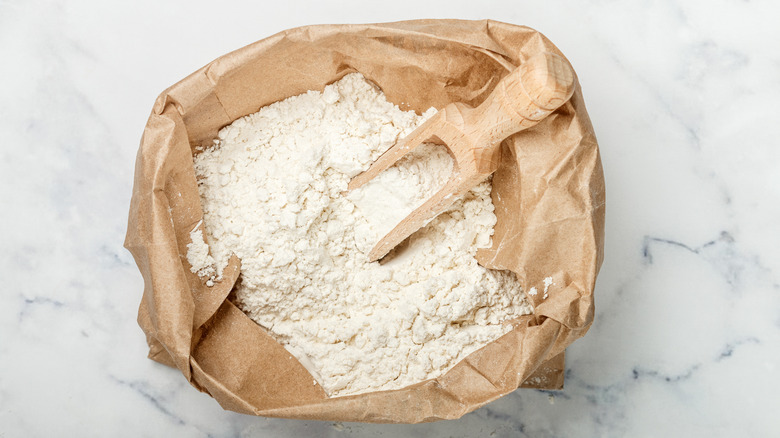
Using the wrong flour to make your bagels can leave you with the incorrect texture. So, if your bagels end up with a fluffier texture, more similar to bread rolls, it might be traced to your choice of flour. After all, bagels are mostly flour and water, so it makes sense that it has such a big effect.
"Flour impacts flavor but, more importantly, it will also play a large role in the texture of the bagel," says Molly Marzalek-Kelly, senior recipe developer for King Arthur Baking Company. If you want that super-chewy bagel texture, she recommends using high-protein flour because "the higher the protein percentage, the chewier the bagel." She notes that standard bread flour is also an option, "but a bagel made with bread flour will be a little bit more tender when compared with a bagel made with high-gluten flour." Max Lesher, a baker at Liberty Kitchen, also recommends high-protein flour for more chew.
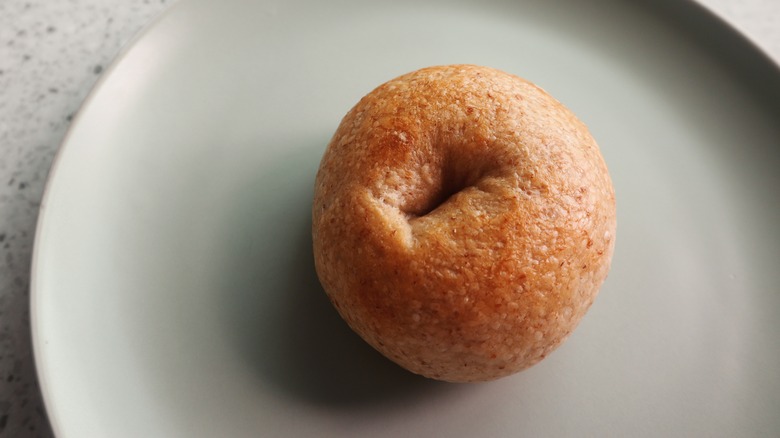
As pastry chef and food blogger Amy Hand of The Skillful Cook reminds us, "be sure to avoid self-raising flour as this has baking powder added that will throw off the bagel's texture." There are also options for those who want to try alternative flours. "If you wish to flavor your bagels with some whole grains, whole wheat or pumpernickel flours are a delicious choice," Marzalek-Kelly says. However, you won't get that same classic bagel texture if you deviate from white flour. It depends what you're going for.
Under-working the dough
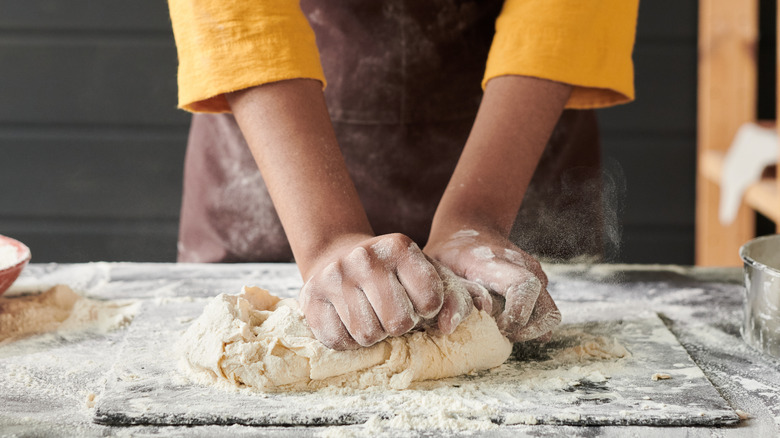
If you're struggling with bagels that are flat, heavy, or dense, under-working the dough could be the problem. "Kneading is essential for developing the gluten network in the dough," recipe developer Molly Marzalek-Kelly explains. "Without sufficient kneading, the dough won't have the necessary structure, leading to bagels that are flat and lack the characteristic chewiness."
But that's not the only issue. "Insufficient kneading can also lead to a denser texture because the gluten network isn't strong enough to trap the gasses produced during fermentation," Marzalek-Kelly adds. She notes that this can lead to heavy, compact bagels.
Luckily, it's not hard to resolve this mistake. You just have to knead your bagel dough for longer. Because it's a fairly dense dough, it might need to be worked for longer than you think. "You should always knead your dough until it is smooth, elastic, and passes the windowpane test," pastry chef and food blogger Amy Hand recommends. The windowpane test is approved by "Great British Baking Show" contestants, so you know it's legit. It involves stretching out a small piece of the dough to see whether you can get it thin enough to see through without it tearing. If you can, it means the gluten has developed enough, and your bagels are ready to proof. Not everybody enjoys kneading by hand, so you can always use a stand mixer for this task.
Not using cold fermentation
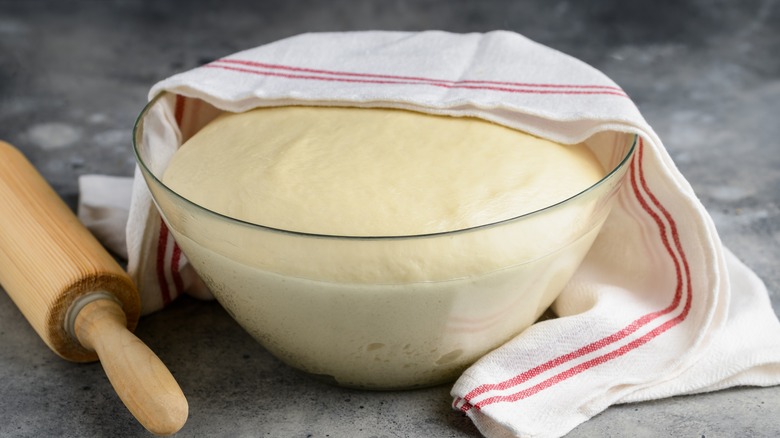
Some bread recipes call for an initial rising time of about an hour before being shaped and proofed again for another 30 to 60 minutes. You might expect the same of bagels, but they actually call for a much longer fermentation time. But why? "Fermentation equals flavor," baking expert Molly Marzalek-Kelly exclaims. "Many traditional bagel recipes involve cold fermentation, where the dough is refrigerated for an extended period — usually 12-24 hours or more." She says that this slow, cold rise lets the dough develop more flavor before being baked.
"The longer the fermentation, the more flavor you will develop in your dough," pastry chef and recipe developer Amy Hand notes. "Speeding up the proving might be beneficial time-wise, but your bagels will end up less flavorful." That said, there is such a thing as fermenting your bagel dough for too long, which affects the flavor and the rise.
Baker Max Lesher also recommends a long, slow, rising time. "With most bread, a longer fermentation is better because it is easier to digest," he says. According to Lesher, it not only gives bagels a more complex flavor, but it also makes them easier to chew because the gluten has had time to relax and break down. The reason for cold fermentation is that it slows down the process, giving the dough more time to develop its flavor and texture without becoming over-proofed.
Under-proofing the dough
There's a lot to know about the proofing process, and with bagels, under-proofing is a common problem. "It can be a challenge to know when your dough is perfectly proofed," says Molly Marzalek-Kelly. This leads many people to start cooking their bagels before they're ready — and then become disappointed with the results. "Bagels that are under-proofed will be dense, heavy, and have an irregular interior crumb structure," she explains.
"If you under-proof your dough, the texture will be very dense, particularly at the bottom of the bagel," pastry chef Amy Hand adds. Sometimes, when a bagel is under-proofed, you'll notice a line of dense dough right near the base, which you'll see clearly if you take a look at the cross-section. This will help you diagnose your issue so that you can fix it.
So, how will you know when your shaped bagels are fully proofed? It can take some experience to be able to tell just by looking at them. But, there's an easy way to test them. "Bagels let you know when they're ready to bake," Max Lesher remarks. "You can test it by floating a bagel in cool water — if it floats, you're good to boil. If not, proof them for longer."
Over-proofing the dough
Yes, under-proofing is something to avoid when making bagels, but so is over-proofing. This is when you leave the dough to rise for too long. It might seem like a longer rise would mean a bigger, better bagel, but it isn't that simple. When the dough is left to proof for too long — especially after shaping — it produces too much gas. This can affect the structure of the gluten, so the bagels end up collapsing.
"If you over-proof your dough, the bubbles formed will pop, and the whole bagel will deflate," notes pastry chef Amy Hand. How does this affect the finished bagel? "Bagels that are over-proofed will be flat, misshapen, and be overly tough," expert recipe developer Molly Marzalek-Kelly explains. So, both over- and under-proofed bagels can be heavy, but over-proofed ones are usually flatter and more likely to have a lumpy or misshapen exterior. With proofing, it's all about those Goldilocks vibes — not too little, not too much, but just right.
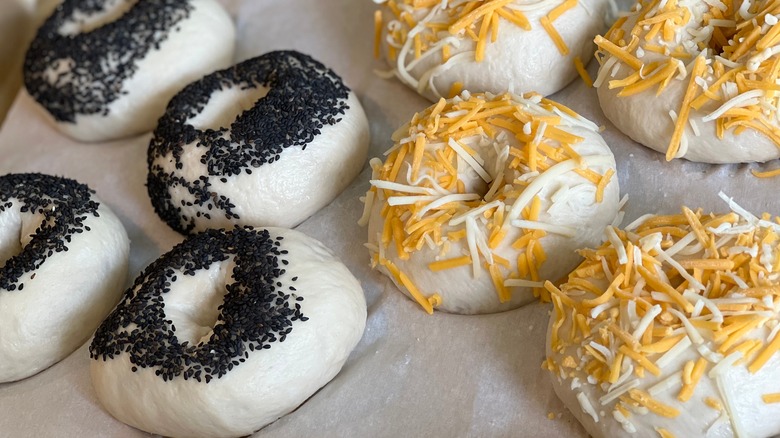
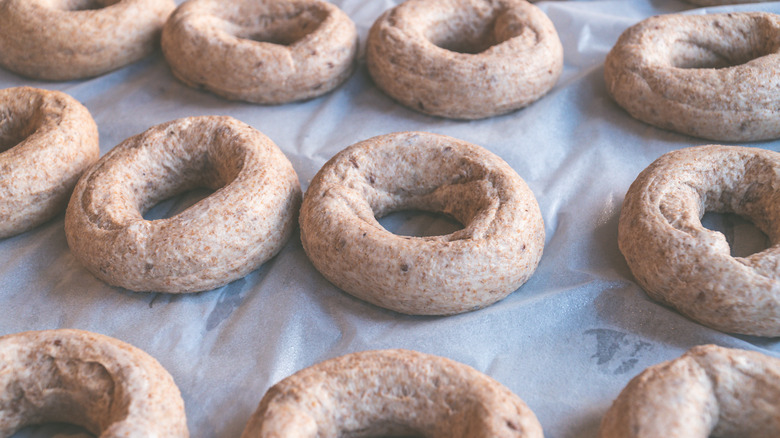
Leaving too small a hole when shaping bagels
There are many factors and theories about why there are holes in bagels, but one thing we can say for sure is that the hole helps the dense bagel dough fully cook through. Without it, bagels would likely be raw in the middle. That's one of the reasons why it's a mistake to leave too small a hole when shaping your bagels. They might end up more like rolls and, not only does that take them out of true bagel territory, it could lead to problems with under-baking.
Leaving too small a hole is a common misstep because people fail to account for the changes that will happen to your bagel after shaping. Firstly, the dough will spring back slightly after you shape it. Plus, you've got to remember that the shaped, uncooked bagel is going to rise more during the second proof. Then it's going to expand even further once it hits the oven. All of these add up, meaning you have to make the hole in your bagel significantly larger than you want it to be after baking. Until you get the hang of shaping your bagels, you might end up with some that have miniscule holes, so make that opening bigger than you think you need it.
Failing to experiment with shaping methods
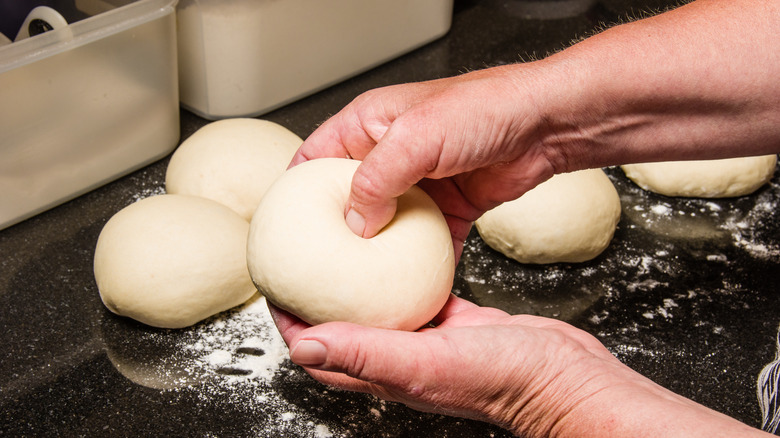
There are two shaping methods for bagels — the ball method and the rope method. Both are totally valid, but it's a mistake not to experiment and figure out which works better for you. Alternatively, if you've had problems shaping your bagels, it might be time to try the method that you haven't been using.
So, how does each method work? For the ball method, you shape a piece of dough into a ball "and then stab a hole through the center with your finger," pasty chef Amy Hand explains. "Then, you can slowly work that circle to be larger with your finger on the countertop — or by spinning it in the air if you're brave." The rope method involves rolling each piece of dough into a rope that's 8 to 10 inches long, using the palms of your hands. Once you've created the right length, you wet the ends and twist them over one another to seal them. This method can end up with slightly more uneven shaping. Or, if you don't seal the ends properly, they may come apart during baking.
Our experts have different opinions about the best method to use and when to use it. "The rope method is most likely the method used in your favorite bagel shop, and the ball method is more approachable for first-time bagel bakers," recipe developer Molly Marzalek-Kelly says. Baker Max Lesher thinks the ball method is better overall, but the rope method is quicker.
Not proofing the shaped bagels on parchment paper
According to Amy Hand, it's a mistake not to proof your shaped bagels on individual pieces of parchment paper. This can help you get a better shape and avoid knocking the air out of them when you get to the boiling step, leaving you with flat bagels.
"After the bagels have been shaped and proofed, they need to be poached for a minute in a baking soda solution, and it is very easy to deflate them when transferring to the bath," Hand explains. "I recommend placing each bagel on a separate square of parchment paper so you can pop the whole thing straight into the water. The paper will quickly come loose, and the bubbles in the dough will be retained."
If you've made bagels that are flat or dense, knocking the air out of them while transferring them to the pot for boiling is a common issue, and this is one of the best ways to avoid it. You don't need to worry about the paper in the poaching water. Baking parchment is designed to withstand hot oven temperatures, so it's fine in a pot of bubbling water, and you can fish it out with tongs once it separates from the bagel.
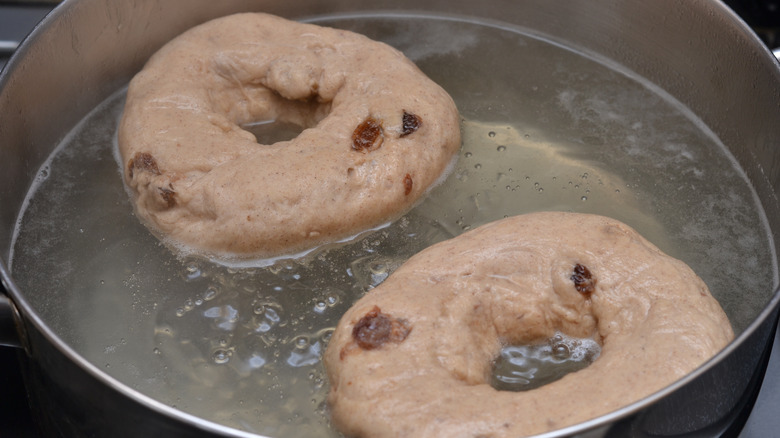
Baking bagels without boiling them first

If you haven't made bagels before, you might not realize there's a poaching stage before you bake them. Yup, that's right — you have to boil them. There's a reason why bagels are boiled before they're baked; this step is part of what makes them different from bread rolls and other seemingly similar bakes.
"Giving the bagels a quick bath in boiling water helps to gelatinize the starches on the bagel's exterior, which contributes to a bagel's signature leathery, glossy skin once it hits the heat of the oven," baking expert Molly Marzalek-Kelly tells us. Recipe developer Amy Hand adds that it helps "create the distinctive chewy texture that bagels are known for." What's more, Hand notes that you should put baking soda in the water, which helps bagels develop a deep brown crust when you bake them.
The boiling step can also make a difference to how your bagels taste. "Boiling bagels can also impact flavor, depending on what is mixed in with the water: barley malt syrup, honey, molasses, salt, etc," says Marzalek-Kelly. If your favorite bakery bagels have a distinct flavor you can't seem to replicate, it could have to do with what was added to the poaching water. Boiling bagels can seem like a pain, but it's a step you shouldn't skip if you want good results.
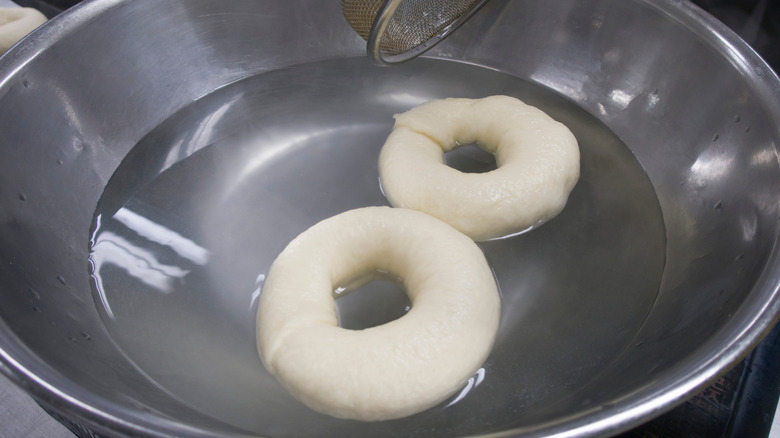
Boiling bagels for too long or not long enough
Did you know that most store-bought bagels skip out on the boiling step? That's why they're so different from fresh ones, proving that the poaching step is important. But you can't just throw bagels in a pot of boiling water for any length of time and expect perfect results. It's important you do it for just the right amount of time — go too long or too short and you can run into issues. If you don't boil them for long enough, your bagels won't be as chewy as they should be. If you boil them for too long, they'll be too tough.
An average bagel recipe calls for dough to be boiled for 60 seconds on each side. This will give you a bagel that's nicely chewy but not overly so. Still, some people prefer a fluffier, breadier bagel. In this case, you can reduce the boiling time to 45 seconds on each side. On the other hand, if you want extra chewy bagels, you can up the poaching time to 90 seconds for each side.
Letting the boiling water cool
Have you gone through the whole process of baking bagels from scratch only to find them dense and undersized? It's disappointing and leaves you wondering what's gone wrong. This problem could come down to issues during the boiling stage. You see, for the best results, bagels must be poached at a full boil. You'll need to do this in several batches and, in your eagerness to get it done, you might rush to move onto the next batch, even if the water isn't bubbling as it should be.
Each batch of bagels will cool the water down slightly, so when you remove them from the pot, you might find the water has cooled and is no longer bubbling. Instead of adding the next batch of bagels anyway, hoping for the best, you should wait for the water to heat back up again. Don't add the next batch of bagels until the water is happily bubbling away, otherwise all your time and hard work might go to waste with subpar results.
Cooking bagels in a too-cool oven
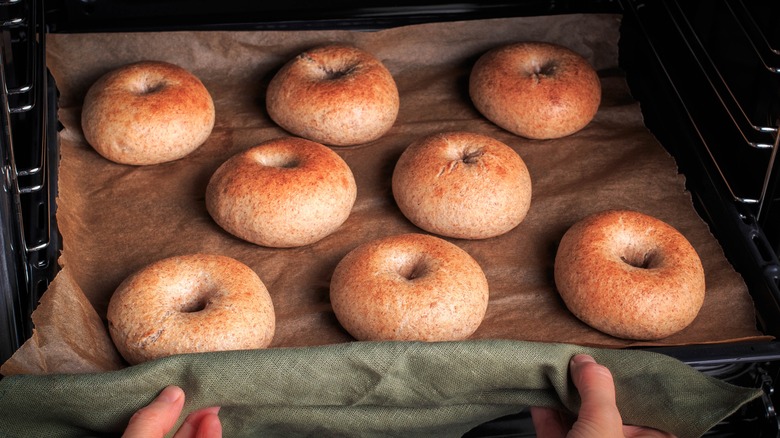
While you can cook bagels in an air fryer, we'd generally recommend cooking them in a regular oven. But one common mistake is cooking the bagels in an oven that isn't hot enough. This is another potential reason for dense bagels. So, if yours have gone beyond pleasantly chewy and are into tough territory, you might want to make some changes to your baking methods.
The reason bagels need to be cooked at high temperatures is to give them a quick rise before the crust sets and they can't rise anymore. Cooler ovens let bread products rise more slowly, but this isn't the way that bagels operate. You should cook them at about 450 degrees Fahrenheit for 18 to 22 minutes, until they look uniformly golden brown. Don't forget to let your oven preheat fully. If you don't, you won't get the rise — caused by the room-temperature dough hitting a hot oven — that you're looking for.