12 New Ways To Use Sandwich Bags Around The Kitchen
If you have a stash of plastic sandwich bags in your kitchen drawer, it's likely you're using them in the same handful of ways — perhaps for keeping leftovers fresh or taking your lunch on the go. Of course, they're certainly a handy solution for all of your storage and food-packing needs, but if that's the only way you're putting sandwich bags to use, you're only just scratching the surface!
These versatile little bags actually have a multitude of uses that extend far beyond packing a sandwich. From simplifying your cooking and meal prep to providing creative baking hacks, sandwich bags can be a true game-changer in your kitchen. Whether it's drizzling dressings, piping frosting, or poaching fish, there's an innovative hack that's sure to streamline your prep time. They can also make cleanup a breeze and reduce waste since it's often possible to wash and reuse the bags.
Read on as we reveal 12 innovative ways to use sandwich bags at home that you might never have even considered. It's time to revolutionize your kitchen routine and unlock the full potential of these underrated storage bags.
Cook omelets
Omelets make for a delicious, protein-packed lunch, but whipping one up can often be a messy affair. Egg can easily stick to frying pans, and even skilled cooks might leave behind morsels of veggies and cheese. But, enter the humble sandwich bag, and you've got yourself a clean and efficient way to make an omelet.
To prep a sandwich bag omelet, first make sure you're using a resealable bag, preferably with a zip top. You'll then need to grab some eggs and crack them into the bag. Add some salt and pepper to taste and seal up the bag, squeezing out any air, and give it a good shake to combine the egg whites and yolk. Next, add your fillings of choice. This could be finely chopped onion or bell pepper, sliced mushroom, ham, or shredded cheese. Seal the bag up again, and pop it into a large pot of boiling water. It's really as simple as that! The omelet should take between 10 to 15 minutes to cook, and once ready it will easily come away from the bag as one large, fully formed omelet.
Pop it on a plate, and dig in. This is a super handy method, with no pans to scrub or mess left on the stovetop. Plus, it's easy to make multiple omelets in one pot, customizing each to different tastes if needed. You can even prep the eggs and filling in advance and store them in the fridge until you're ready to cook them.
Make ice cream
Ice cream is a wonderful treat for a hot summer's day, and making it yourself at home can be super rewarding. However, this can be a complicated process, sometimes requiring an ice cream maker and lengthy freezing times.
To save the stress of making standard homemade ice cream, we have a handy sandwich bag trick for you. This method is perfect for making small portions, can be enjoyed immediately, and allows you to experiment with various flavors.
First, add your ice cream base ingredients to a resealable plastic sandwich bag. This is typically a mixture of milk, heavy cream, sugar, and vanilla extract. You can keep things simple and opt for this classic vanilla flavor, or add in some extras. Pureed strawberries, chocolate chips, mint extract, cookie pieces, or peanut butter would all be amazing additions. Mix the contents of the bag well by squeezing everything with your hands, then ensure the bag is firmly sealed.
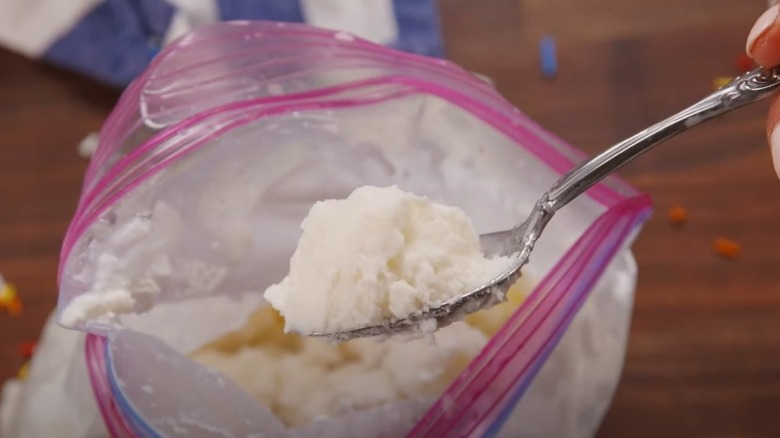
Next, you'll want to place your filled ice cream bag into another, larger bag that's been filled with ice cubes and rock salt. Close this one up too, and get shaking. You'll get a good arm workout here since you'll need to shake constantly for about five to 10 minutes. Soon, though, you'll be rewarded with a creamy ice cream that's ready to enjoy right away.
Poach fish

Poaching fish in a sandwich bag is a brilliant hack that ensures perfectly cooked, moist, and flavorful results every time. This is a great method that allows for precise cooking and enables you to lock in all of those delicious juices.
Many types of fish are suitable for poaching, such as salmon, cod, or tilapia. First, pop your fish of choice into a resealable sandwich bag along with a drizzle of olive oil and a pinch of salt and pepper. Now is also the time to add any herbs and spices with which you might like to flavor the fish. Lemon, garlic, and Italian herbs would be delicious options. You could also try a sweet and tangy combination of honey and mustard, or some soy sauce, rice vinegar, sesame oil, and red pepper flakes for an Asian-inspired twist.
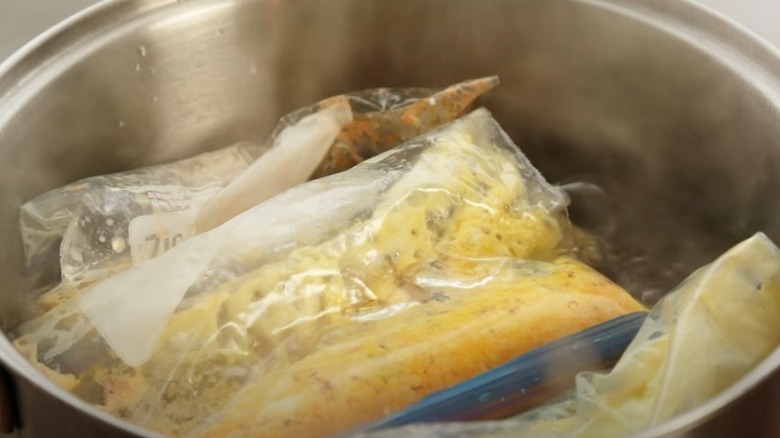
Next, seal up your bag and get out as much of the air as possible, then pop it into a large pot of hot water. Ideally, the water should be kept at a temperature of between 120-140 degrees F. Let the bagged fish sit in the hot water for 20 to 30 minutes (this will depend on how large the fillets are). You'll know it's perfectly cooked once the flesh is opaque and flaky.
Meal prep by marinating meat and fish
We know that sandwich bags are great for storing leftovers, but how about for meal prepping? Using these bags is a nifty way to prep marinated meats and fish in advance, ensuring your dinner is quick to make and packed with flavor.
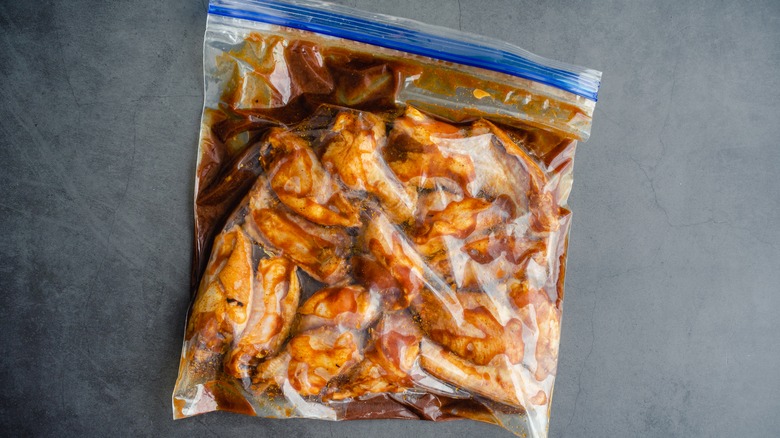
This method also means minimal cleanup since you can mix the marinade right in the bag. First, add all of your marinade ingredients and mix everything up by giving the bag a good shake or squeeze. Then, choose your protein source of choice for marinating, such as chicken, steak, salmon, or even tofu. Place this into the bag with the marinade and give everything another good massage with your hands. Now, you can simply pop the bag in the fridge until you're ready to cook the meat. However, marinating overnight or for up to 24 hours will ensure your protein of choice is infused with plenty of flavor.
Once you're ready to get cooking, just remove the meat, fish, or veggie option from the bag and prep it as desired — in the oven, in a frying pan, or on the grill. The bag can simply be discarded, and there'll be no extra bowls or chopping boards to wash up.
Steam veggies
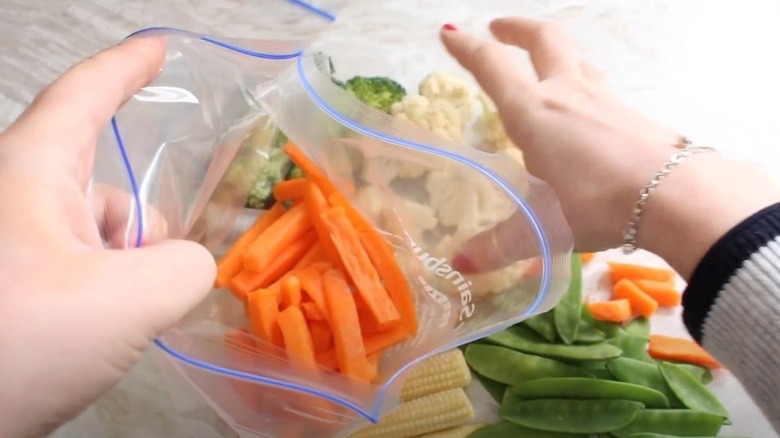
Another type of food that can be cooked with ease in a sandwich bag is vegetables. This is a brilliant, fuss-free technique that helps the veggies to retain nutrients, color, and flavor. Plus, it requires minimal equipment, making it the perfect hack for busy weeknights or whenever you need to whip up a quick, healthy meal.
For this simple steaming method, the first step is chopping up your vegetables into bite-sized chunks. Broccoli, cauliflower, carrots, and green beans are all well-suited for cooking in a bag. Next, transfer the chopped veg to your sandwich bag, and seal it almost all the way across, leaving just a small gap for the steam to escape during cooking. Then, it's a simple case of putting the bag in the microwave and cooking it on a high setting for about three to four minutes.
Be careful when opening the bag, since the hot steam will release rapidly. It can help to leave everything to cool for a few minutes before handling the bag and veg. Then, tip everything out of the bag, and you should find that the veggies are wonderfully tender-crisp. Transfer them to a plate, and season or dress as desired to upgrade those steamed veggies.
Mix and drizzle salad dressings
If you love mixing up flavorful dressings for adding to your salad bowls and sandwiches, using sandwich bags can be an incredibly convenient way to do this. Not only can the dressing be mixed up in the bag itself, saving on washing up, but you can also use it as a nifty tool for drizzling the dressing perfectly over your meal.
Start by gathering your dressing ingredients. There are countless salad dressing options from which to choose, depending on your taste preferences, whether you like a classic creamy ranch, a nutty tahini, or tangy blue cheese dressing. Once everything is in the bag, seal it and give it a good shake to combine the ingredients together. After this, you can open it up and give it a quick taste, making any seasoning adjustments if needed.
Now, here's the fun part. When you're ready to use the dressing, just cut a small corner off the bottom of the bag, and you've got yourself a makeshift piping bag. This allows you to drizzle the dressing evenly over your salad without any spills or mess. If you have any dressing left over, you can reseal the bag and save it for later. Just fold over the opened corner and place a clip over it to keep it closed.
Pipe frosting
Our next sandwich bag hack is sure to help you take your baked goods to the next level. It couldn't be simpler to turn a humble sandwich bag into an easy-to-use piping bag, perfect for filling with frosting and decorating cakes and cookies.
Get your frosting prepared first, ensuring it's nice and smooth. The consistency should be firm enough that it holds its shape, but also soft enough to pipe or spread easily. Once the frosting is ready to go, snip off one corner of a sandwich bag with a pair of scissors. Then, take your piping nozzle of choice, put it inside the bag, and push it through the hole. The hole should be big enough that the end of the nozzle is poking outside of the bag, but held snuggly in place, so you can adjust the size if needed.
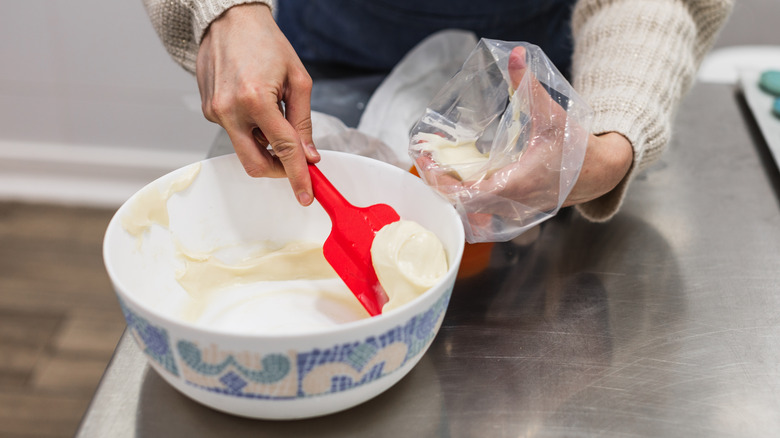
Now you can spoon that delicious creamy frosting into the piping bag. Fill it about halfway — don't overfill it — and use your hands to work it down to the bottom of the bag and remove any air bubbles. Then, you're ready to pipe. Hold the bag and nozzle over your cake or cookie, and gently squeeze until the frosting comes out. You can make swirls or patterns as desired, with different nozzles each giving a unique look.
Prep smoothie ingredients
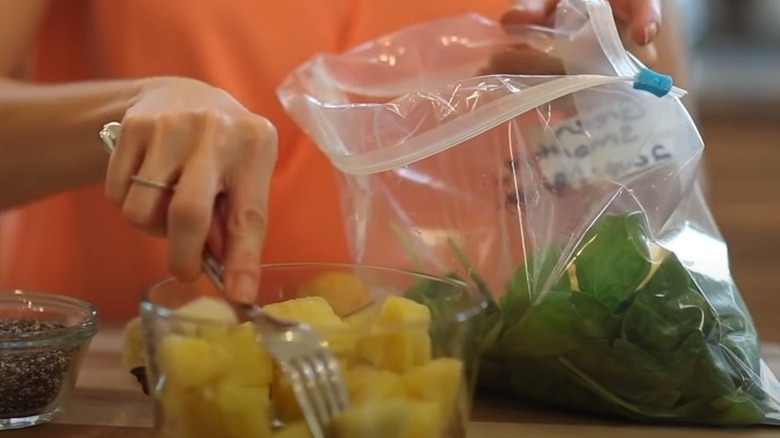
If smoothies are a staple in your household, sandwich bags can come in handy for prepping the ingredients in advance. Using this method, you can prep everything in a big batch and decant it into separate bags. Then, whenever you fancy sipping on a fresh smoothie, all you'll need to do is pop everything in your blender with your liquid of choice.
When it comes to choosing your smoothie ingredients, there are so many amazing combinations that work wonderfully blitzed up into a nutritious, refreshing drink. Try combining banana, pineapple, and mango for a tropical treat, or strawberries, blueberries, and raspberries for a berry-loaded smoothie. Greens like kale, spinach, or cucumber also make great additions.
If necessary, chop your fruit and veg into chunks, and simply add everything you want to combine together into the bags. Then, store the bags in the freezer until you're ready to blend them. When you come to make the smoothie, add some water, milk, or juice to help everything blend smoothly. If desired, you can also sprinkle in some chia seeds, flaxseeds, or protein powder for an extra boost of nutrients.
Make cookie crumbs

The avid bakers among us will likely have encountered a recipe that requires cookie crumbs, from pie crusts to cheesecakes and dessert toppings. Crumbling cookies by hand can be time-consuming, and blitzing them in a food processor means extra washing up. The next time your recipe calls for cookie crumbs, try making them in a sandwich bag.
This technique is pretty simple. All you need to do is add your cookies to a sandwich bag and seal it up securely. Make sure you've squeezed out as much air as possible from the bag, otherwise it could burst as you're crushing the cookies. Then, grab a rolling pin, meat mallet, or even the bottom of a heavy pan, and use it to crush the cookies in the bag. Keep going until you have your desired consistency, whether that's fine crumbs or larger chunks.
Now, your cookie crumbs are ready to use. This method works for all different kinds of cookies, such as Oreos, gingersnaps, shortbread, and graham crackers. If you've made too many cookie crumbs, you can keep them stored in the bag for another recipe. Labeling the bag with the date and type of cookies inside is always helpful.
Keep your kitchen scales clean
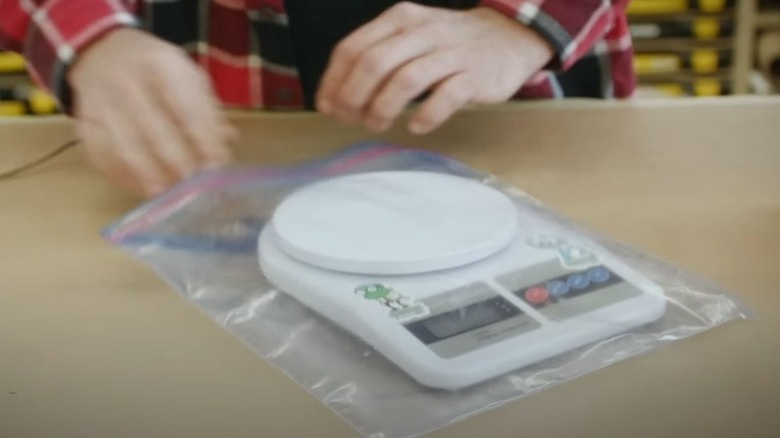
A vital tool for precise cooking and baking, kitchen scales are reached for in a range of recipes. But, they can quickly get dirty when weighing sticky or greasy ingredients. That's where the simple sandwich bag comes into play, providing an easy solution to keep your scales free of mess.
Simply take a sandwich bag that's large enough to cover your scales, and slip it over them, making sure the weighing surface is fully covered. You should still be able to access the buttons on the scales through the bag. Now, you can weigh any solid ingredient without the need for a bowl or plate, directly on the bag-covered scale.
Once you've transferred your weighed-out ingredients to your mixing bowl or container, slip the bag back off. You can either dispose of it or give it a rinse so it can be used again. This method saves you from having to clean the scales themselves, which generally are not suitable for submerging in water. Now, you won't have to worry about sticky residues working their way into those crevices!
Dispose of oil cooking oil
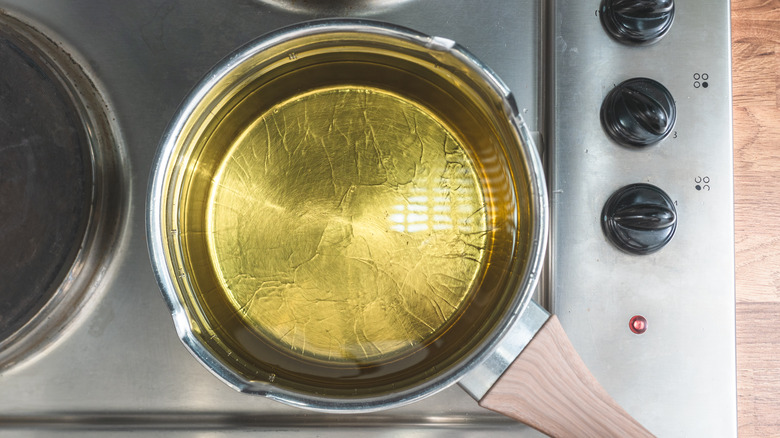
Disposing of cooking oil can be a hassle. It shouldn't be poured down the drain, and emptying your pan of oil straight into a thin trash bag sounds like a recipe for a disastrous spillage. Rather than getting rid of excess oil in a potentially risky way, just grab a sandwich bag.
First, allow the used oil to cool, so it's safe to handle and won't melt the bag. Then, open up a sandwich bag and hold it securely. If you can get someone else to hold the bag open for you, this is super helpful. You can also use a funnel to avoid any spills if you have one on hand. Now, pour the oil into the bag and seal it tightly, removing any excess air. Make sure there are no leaks before disposing of the bag. It can be a good idea to double-bag the oil to prevent unwanted spillages in your trash can.
Remember, if the oil is still relatively clean, you can also opt to reuse it for another recipe. Just keep it stored in the bag or another container in your pantry until next time. It's also possible to recycle cooking oil at certain recycling centers.
Melt chocolate

A bowl covered in melted chocolate is notoriously difficult to clean, and we're here for any hack that saves on washing up time. Luckily, it's easy enough to melt chocolate in a sandwich bag, which can also serve as a useful drizzling aid.
Select your chocolate of choice and break or chop it into small chunks. Chocolate chips would also work great here. Next, pop the chocolate into a plastic sandwich bag and seal it up, pressing out the air. There are two techniques you can choose from to melt the chocolate. You can either simply place the chocolate-filled bag in the microwave and heat it in 30 second intervals, or place the sealed bag into a pot of gently simmering water for a few minutes. Both should result in beautifully smooth, gooey melted chocolate.
Once the chocolate is melted, you can use the bag itself for drizzling, much like with the salad dressing hack. Just snip off a small piece from the corner of the bag to create a makeshift piping bag for all your drizzling or pouring needs.